Start me up
Before you download and install the apps be sure to register as a member here.
You can create your own username. We only ask for email for password recovery.
If you want to use your email, put it in the ‘username’ box. Then when you install
the app go to settings and enter that same username and password.
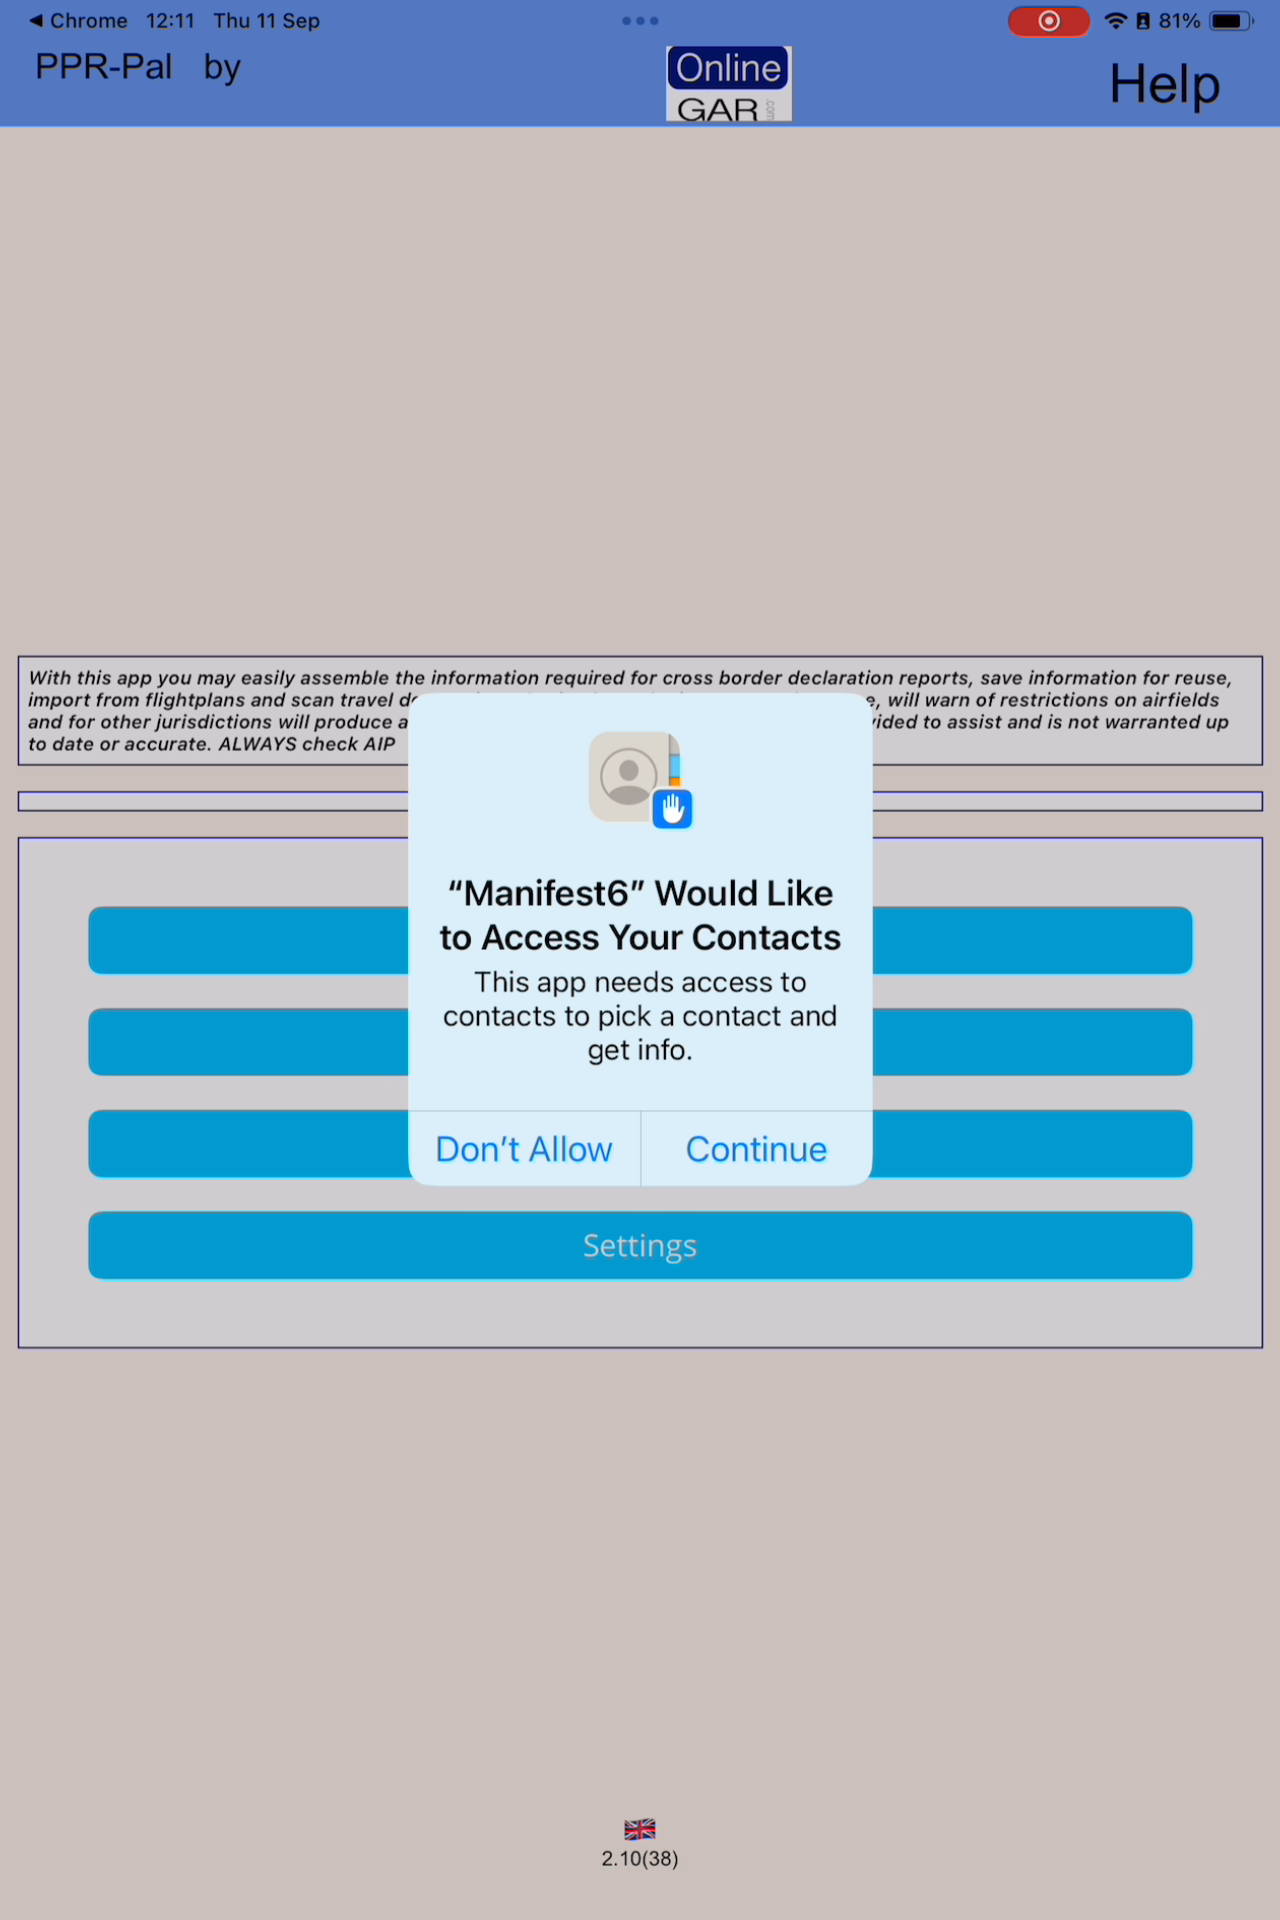 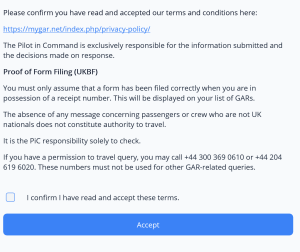  |
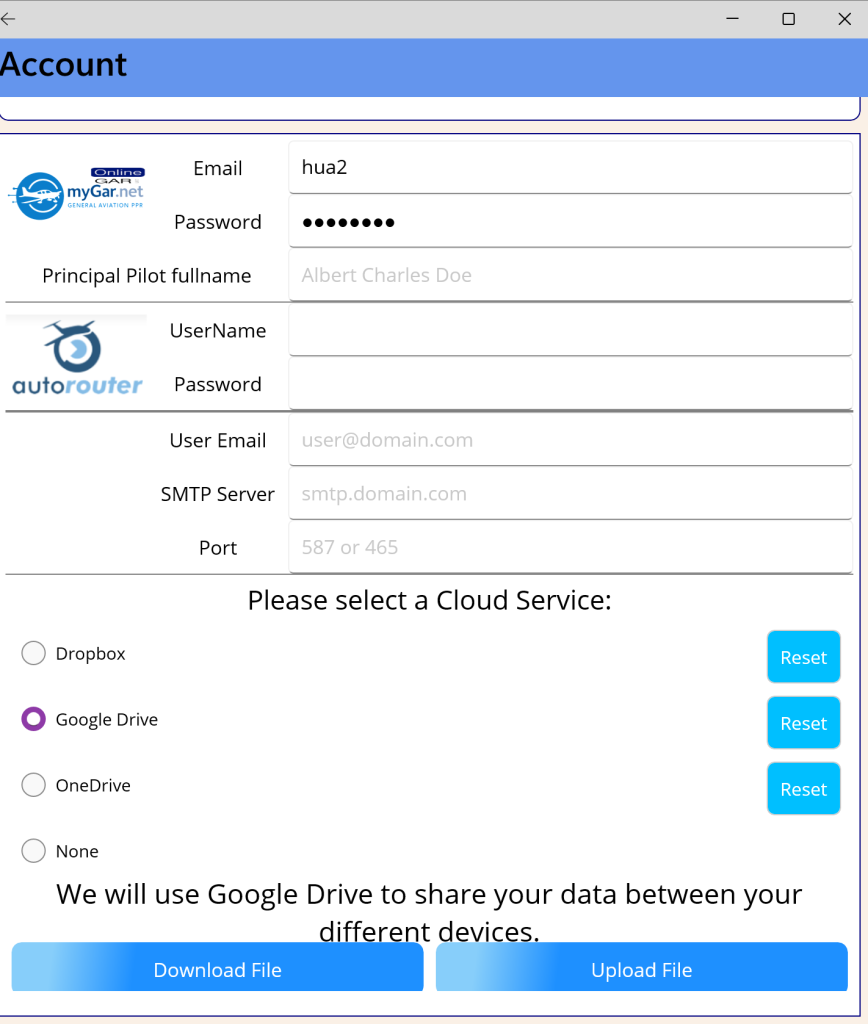
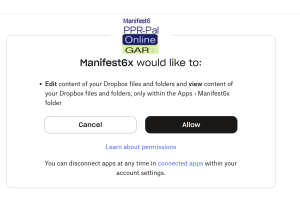
Immediately after installWe’ll assume you followed the instructions and managed to download and add the app to your preferred device(s). Now let’s reveal the hidden wonders. After a first install on mobile devices the app will ask permission to access your contacts. This is because ‘people’ are a major component of your declaration and carry confidentiality issues. Your contacts are only used to assemble declarations and not for any other purpose. Another screen emphasises the terms and conditions. You must accept in order to use the app. Quite simply we do not create the messages — we just pass them on and accept no liability for mistakes or misinterpretations of the rules or the information. Minimum set upNow you can go to the ‘settings’ screen and enter your member username and password — the one you used on this site to register. You only have to do this once. There are other settings such as entering your credentials for Authorouter — this makes importing an Authorouter flightplan very easy. The mail server fields are for advanced users who do not wish to use the device’s native mail client — not necessary for normal use. Entering the principal pilot name is optional. Below that you will see radio buttons to select a cloud service — again optional if you only use one device. Setting up a cloud serviceThe app stores data locally on your device. If you want the same data across multiple devices you must set up synchronisation using your own cloud service such as iCloud, Dropbox, Google Drive or OneDrive. |
 |
You can use the app immediately, however for UK flights you must enter your MyGAR username and password in the settings page. |
|
If you approve, you will now be able to sync your data between different devices (provided they are all connected to the same personal cloud service). |
|
|
AFTER SETUP — key steps for an easy life(on first time use on some devices there may be a delay opening screens – this will go away and we continue to try to make performance improvements) All systems such as these to deliver ‘trip’ information in a form are made up of three parts:
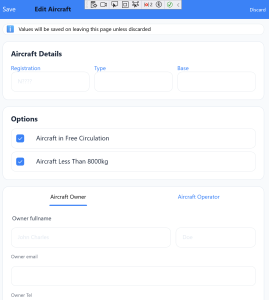
You don’t want to be filling in aircraft details every time you create a declaration. Crew and passengers will often be the same too. So it’s worth setting these up before creating your first declaration. Step 1 — enter and save an aircraft
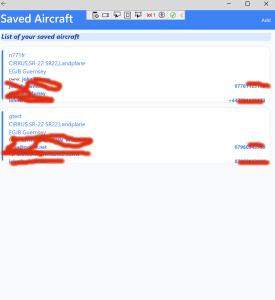
Click ‘manage aircraft’ on front menu – if you have already saved aircraft they will be shown as a list for you to edit or delete |
Now to add peopleThe apps save all crew/passenger details in you contacts with the exception of the windows platform where person data is held in a sql database locally. On devices like android or IOS this is very secure. Mac desktop also uses your personal contacts – thats why at the beginning it asked for your permission. The Windows platform is not as well integrated into one contacts system so the sql database is embedded securely within the app. |
|
|
|
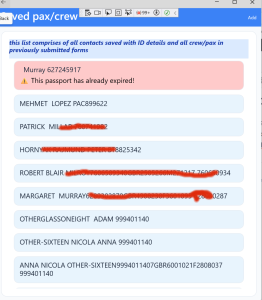
Click on Manage crew and passenger lists. The app will review your contacts and select those which appear to have travel document details – If you have previously submitted declarations using the app it will search those and extract all previous crew and pax. Hence you will see a list such as this -or may nothing the very first time
In the dummy screenshot shown you will notice that one passport is highlighted in pink to denote a problem with the document details |
 |
Enter passport details for crew or passengers. |
|
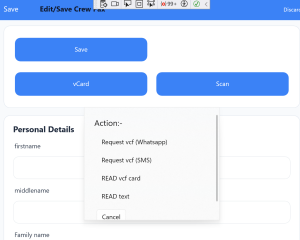
You can request passenger details via VCF contact sharing.
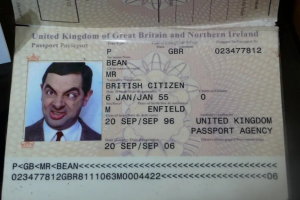
because the apps integrate with contacts you can get a passenger to send you their contact details using a vcf card – it is common for most contact apps to allow you to ‘share’ a contact using a vcf card the Long passport number is the 28 character line at the bottom of the passport page. in the dummy example it is the line starting 0234… if this line – well just teh first 28 chars are entered into the notes field thus |
|
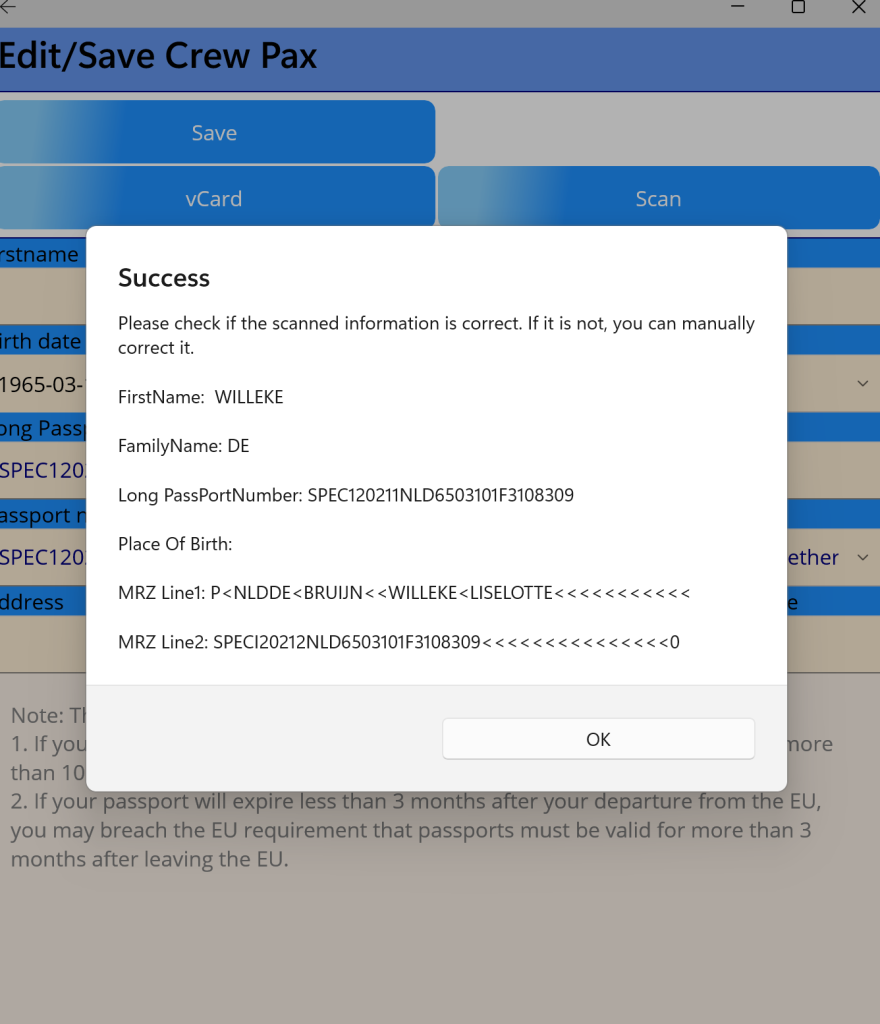
The app can scan passport images and auto‑populate fields.
You can ask a passenger to photo their passport page and send it to you – Using OCR the app will import as much detail as it can recognise. The best results are where there are no reflections/shadows and the image is cropped to the borders of the page. On Phones and tablets you can use the built in camera. Avoiding shadows and bright spots applies here too.
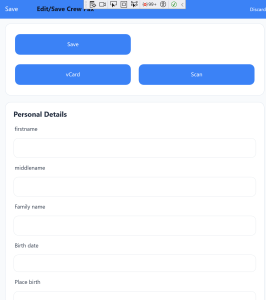
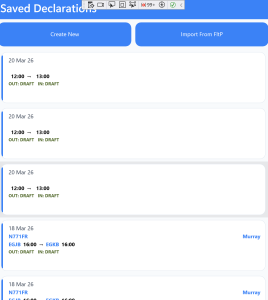
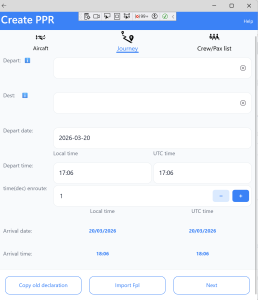
Ready to make a declarationClick on ‘Create/edit’ on main menu
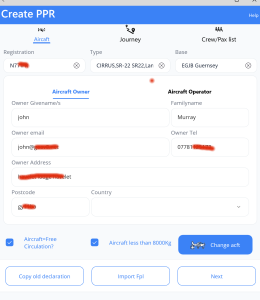
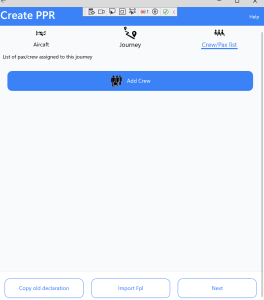
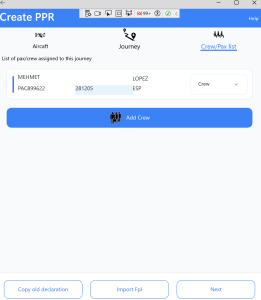
the declaration screen has 3 tabs across the top referring to the previously mention 3 pages of a typical declaration
At the bottom right of the aircraft tab/page there is an ‘add aircraft button. You have previously saved an aircraft for posterity so now you’ll be taken to your list, select it and it will fill in all the fields on this tab/page To move between tab/pages just tap on the tab – a blue line indicates which is the active page Now lets jump to the Crew Pax page Once you have selected a previously saved px/crew or entered all their details manually – the back button will save and add them to the manifest for this trip Please note another gotcha – on the crew list you MUST specify a the status of the crew/pax AND there must be one Pilot in Charge
Now click on the Journey tab
this is the meat of the declaration This needs little explanation but an understanding of some constraints
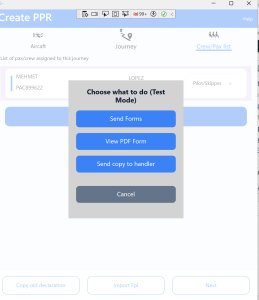
the next button brings up a menu – to send – just view pdf if it is not a UKBF electronic gar – or share with handling agent
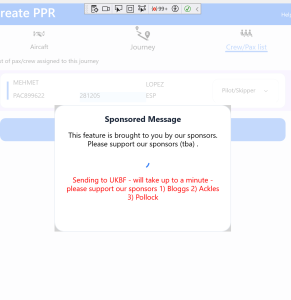
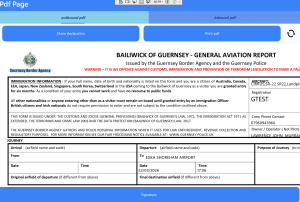
Clicking on send forms will alert you if there are any validation issues such as not setting a PiC or mandatory fields in error if the form validates there will be a ‘busy’ screen shown – we hope that sponsors will assist and this will be the only advertising screen It can take up to a minute to send the data and get a response
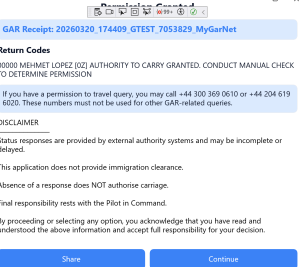
If all crew and passengers pass the ‘permission to travel’ test you should see a screen like this It will say ‘permission to carry granted’ REMEMBER this is NOT a message from us but from UK BOrder Force – They caveat the message saying you need to carry out a manual check – The usual only way of doing that for a non GBR/IRL citizen is to check on the Online ETAS where electronic visas are granted. If in any doubt cancel the form and call one of the numbers given – Note that if the other end of the journey is channel islands IoM IRL france or Belgium it will populate a pdf form approriate to them and you may forward by email
|
t