Getting started
Setting up Manifest6
Everything you need before your first GenDec — follow these steps in order and you’ll be ready to fly in about ten minutes.
Step 1 — Register on this website
Before downloading the app you need to register as a member here. Choose a username and password — your email is only used for account recovery, not as your login. If you want to use your email as your username, enter it in both the username and email fields.
Make a note of your username and password — you will need to enter them in the app settings.
Step 2 — Download and install the app
Once registered you will be able to see the download links in the Members Download page. There are versions for iOS, Android, Windows and Mac.
Step 3 — First launch
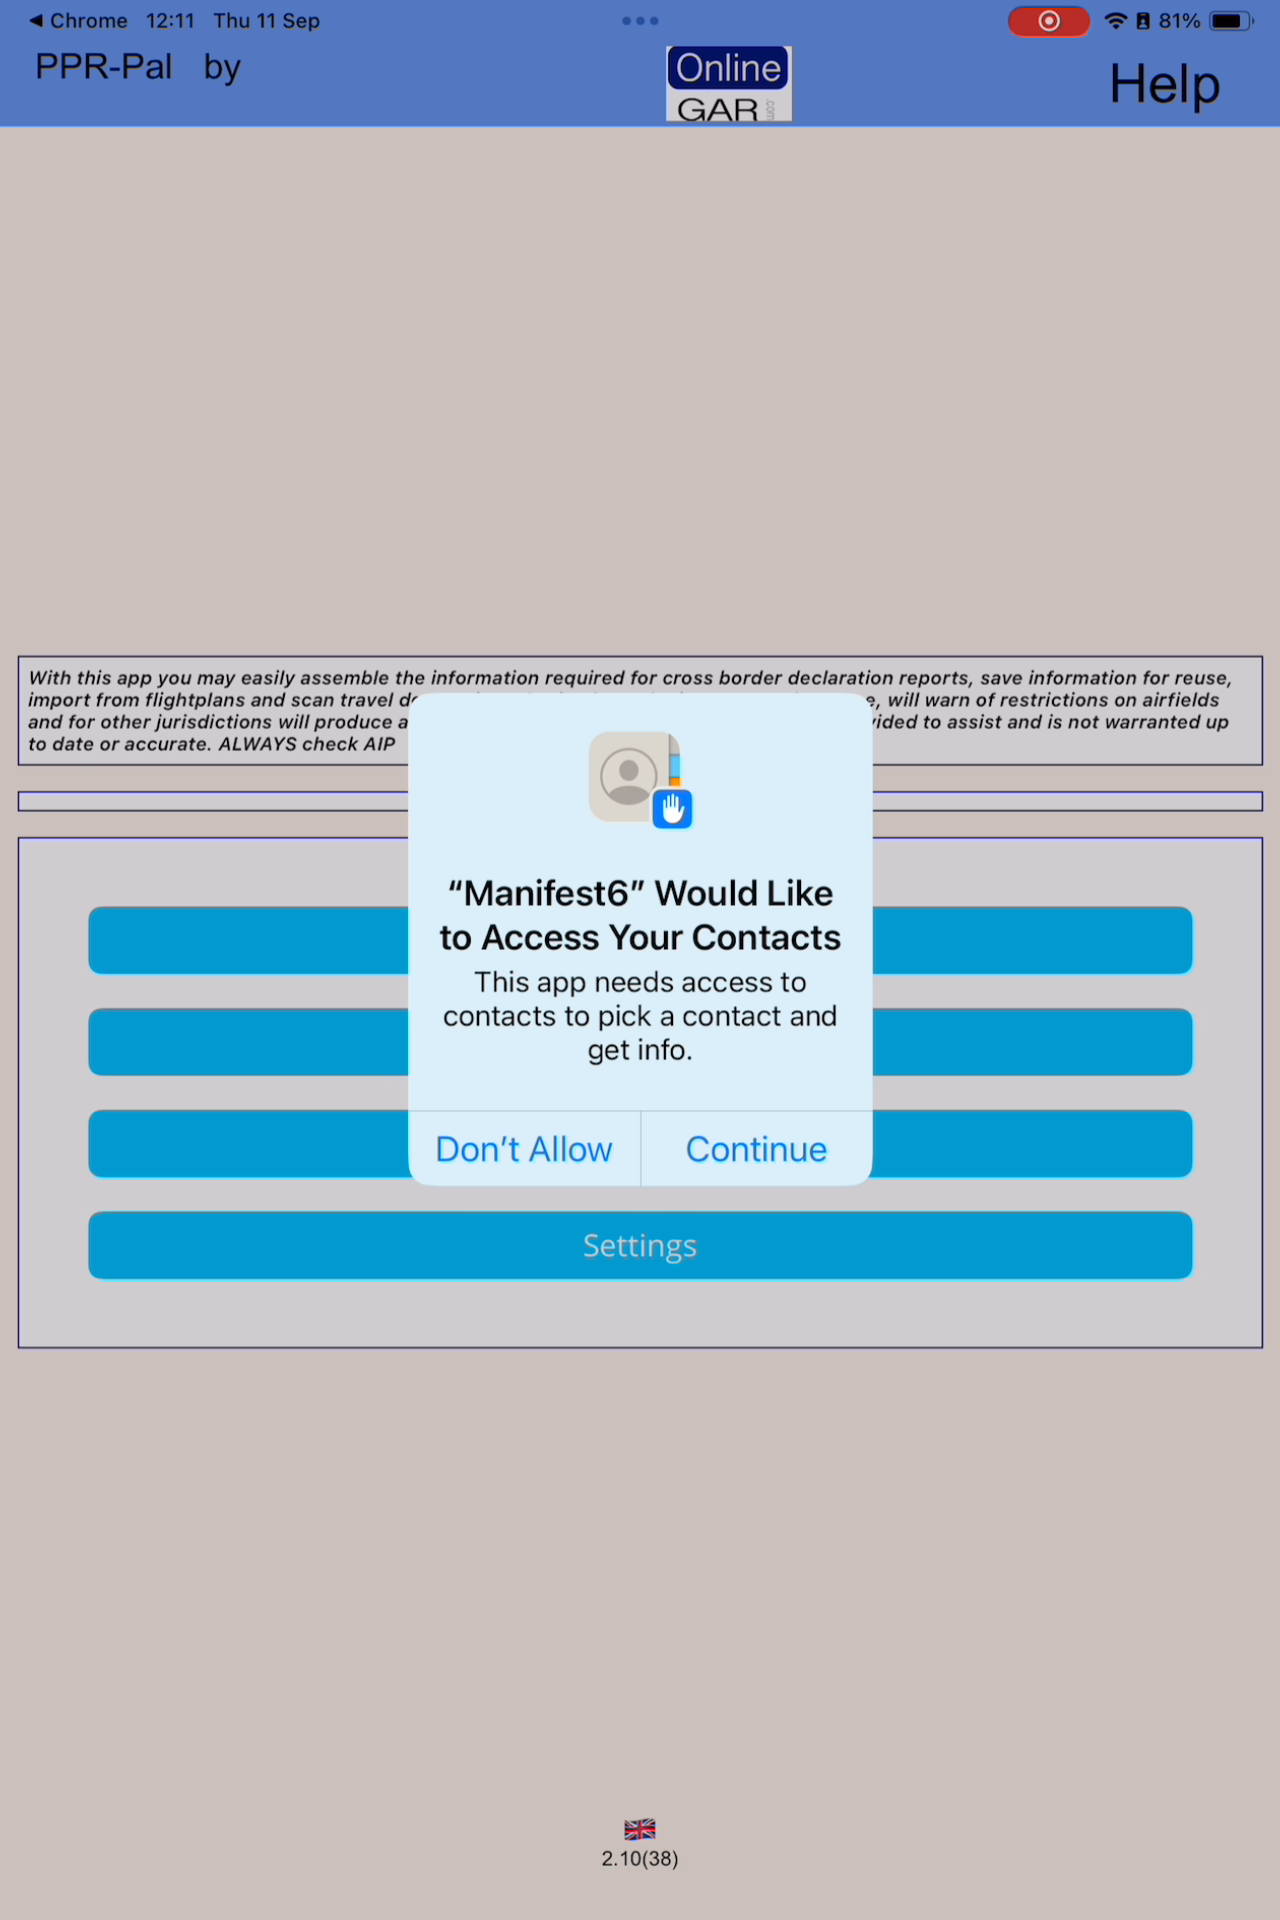
On mobile devices the app will ask permission to access your contacts. This is because crew and passenger details are stored securely in your contacts (except on Windows where a local database is used instead). Your contacts are only used to assemble declarations — never for any other purpose.
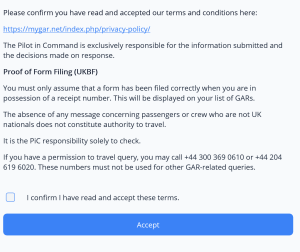
You will also see a terms and conditions screen. You must accept to use the app. The app passes your declaration to the authorities — it does not create or interpret the rules, and accepts no liability for errors or misinterpretations.
Step 4 — Settings
|
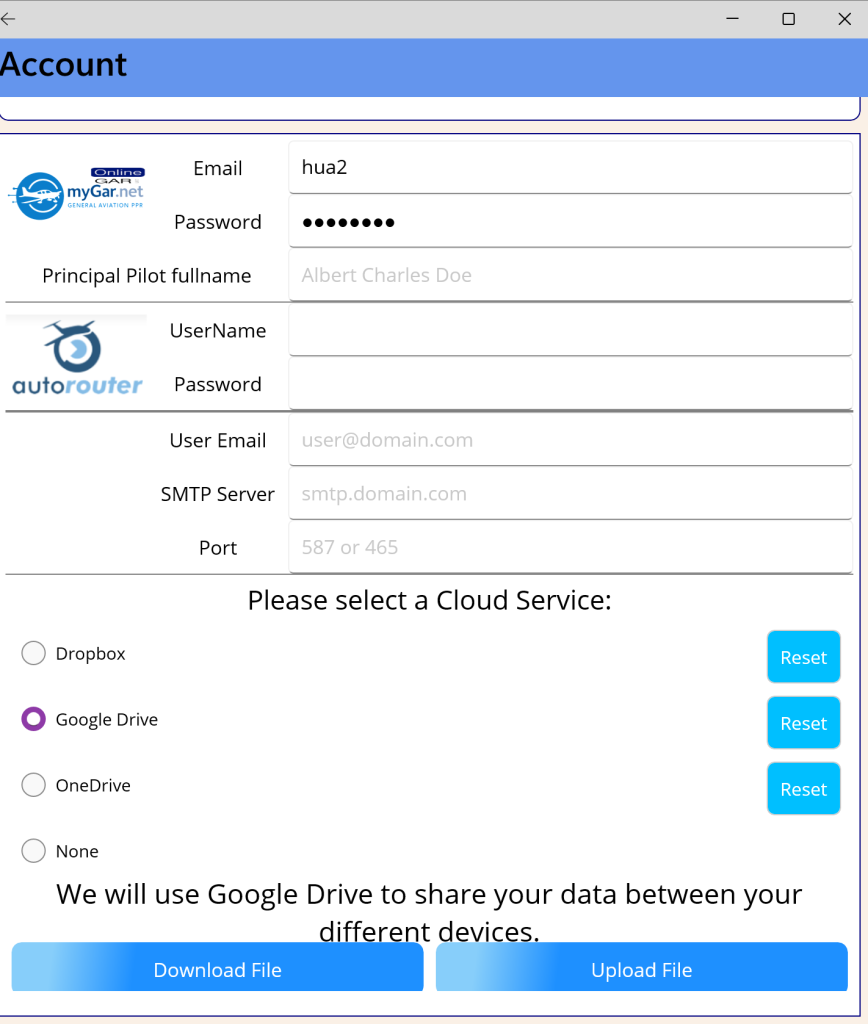
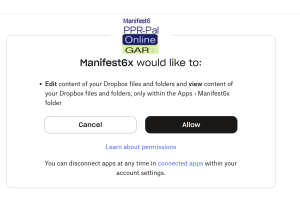
Go to Settings and enter your MyGAR username and password — the same ones you used to register on this site. You only need to do this once. Other settings available:
For UK flights you must enter your MyGAR username and password before submitting a GAR. |
Step 5 — Cloud service (optional but recommended)
|
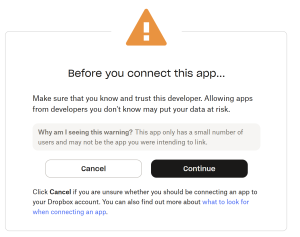
The app stores data locally on your device. If you want the same data across multiple devices — say an iPhone and a Windows laptop — you need to set up synchronisation using your own cloud service. Supported services: iCloud, Dropbox, Google Drive, OneDrive. Select your preferred service in Settings. Once approved, your data will sync automatically between all devices connected to the same cloud account. |
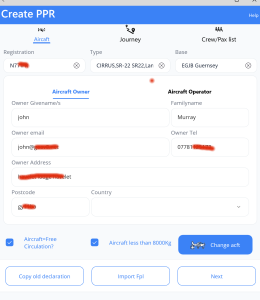
Step 6 — Add your aircraft
|
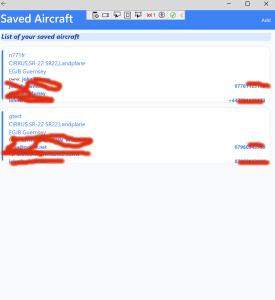
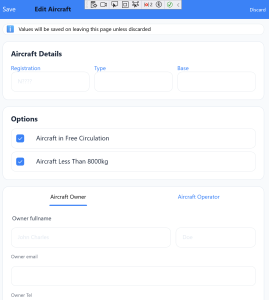
You don’t want to re-enter aircraft details every time you create a declaration — save your aircraft once and it fills in automatically from then on.
Your saved aircraft will appear in a list ready to select when creating a declaration. You will need: aircraft registration, ICAO type (e.g. C172, PA28, SR22), operator name and address. |
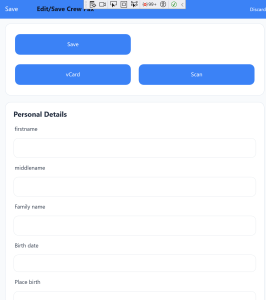
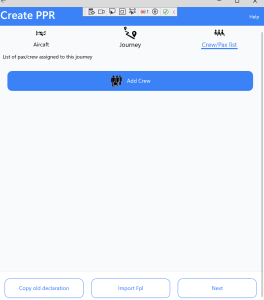
Step 7 — Add crew and passengers
|
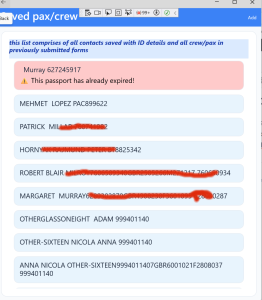
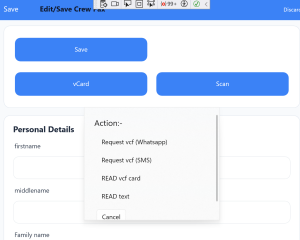
Tap Crew on the home screen. The app will search your contacts for anyone with travel document details saved, and also check any previous declarations. To add a new person tap Add (top right) and fill in their details. Most fields are mandatory. The Pilot in Command must have an address and contact details. You will need passport details for each person: number, nationality, date of birth, expiry date. Faster ways to add peopleVCF contact sharing — ask a passenger to share their contact card with you. If their passport’s 28-character machine-readable line is stored in their contacts Notes field in this format:
…the app will import almost all their details automatically. |
|
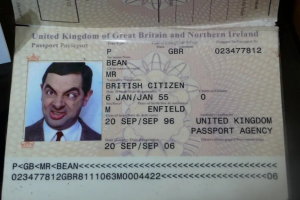
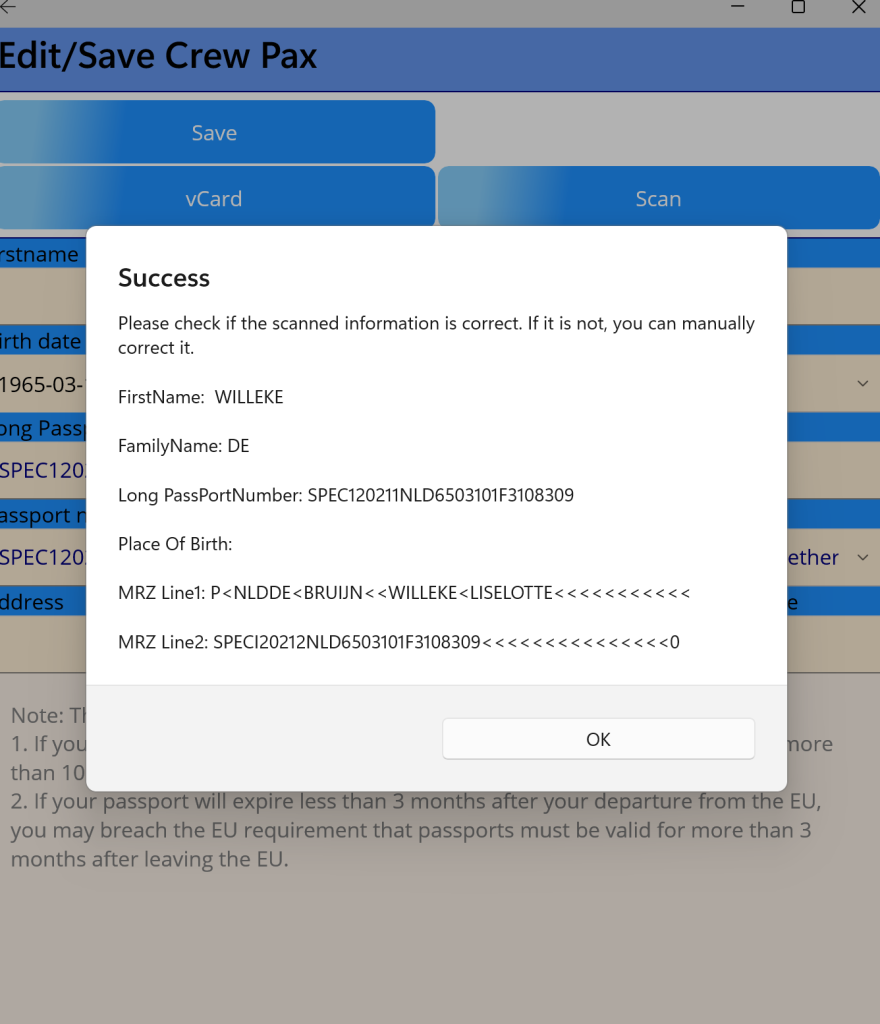
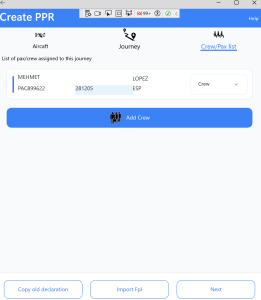
Passport scanning — ask a passenger to photograph their passport data page and send it to you. The app uses OCR to read and import the details automatically. Best results come from well-lit images with no shadows or reflections, cropped to the passport page borders. On phones and tablets you can use the built-in camera directly. Important: on the crew list you must specify the status of each person (crew or passenger) and there must be exactly one Pilot in Command. |
Step 8 — Create your first declaration
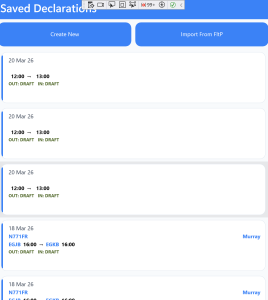   
|
Tap Create / Edit on the home screen. Any previously submitted declarations will appear as a list — useful as a quick reference if you are asked for a GAR receipt. First time around the list will be empty — tap Create New. The declaration screen has three tabs:
Switch between tabs by tapping them — a blue line shows the active tab. |
|
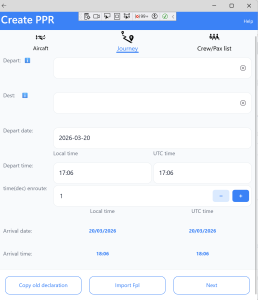
The Journey tab
Three buttons at the bottom:
|
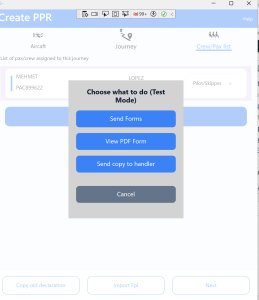
Step 9 — Send the declaration
|
Tapping Next brings up the send menu:
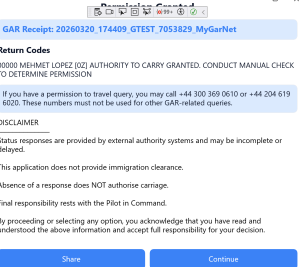
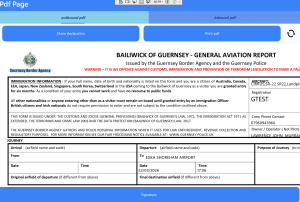
Permission to Travel responseIf all crew and passengers pass the UK Border Force Permission to Travel check you will see a Permission to Carry Granted screen. This message comes directly from UKBF — not from us. UKBF advise that you should still carry out a manual check for non GBR/IRL passport holders, for example checking online ETAS. Note that a conventional GAR has already been sent at this point. If there are questions over any crew or passenger you should cancel the GAR while resolving them — UKBF require a GAR to be on file even where there are passenger queries, so that they can cross-reference. Channel Islands, IoM, Ireland, France, BelgiumFor these destinations the app will generate the appropriate PDF declaration form automatically. You can forward it by email from within the app. |
Manifest6 Help — last updated June 2026 | ← Back to Help Home